5 Minute Fruit Compote


Summertime in these parts is hot. Not the good summer vacation kind of hot either, but the sticky, miserable, fanning yourself while sipping iced beverages because the AC just can't handle it type of hot. 

You know that line, "If you can't stand the heat stay out of the kitchen?" Yeah, after 30 minutes over an oven trying to put together a weeknight dinner, there are very few reasons I'd stay a bit longer. This dessert, however, is one of them.


Fruit compote is one of those things that makes everything a little bit better. Spoon it over waffles and claim it's breakfast. Add a scoop of ice cream (or, as we like, a spoonful of Cool Whip) and call it dessert. Drop dough over it and bake for a cobbler that will have everyone begging you for the recipe. And the best part? It comes together in five minutes on your stovetop, and dirties exactly one pan.

Go! Hurry! Make it now! I'll bet you've even got the ingredients floating around your kitchen already!

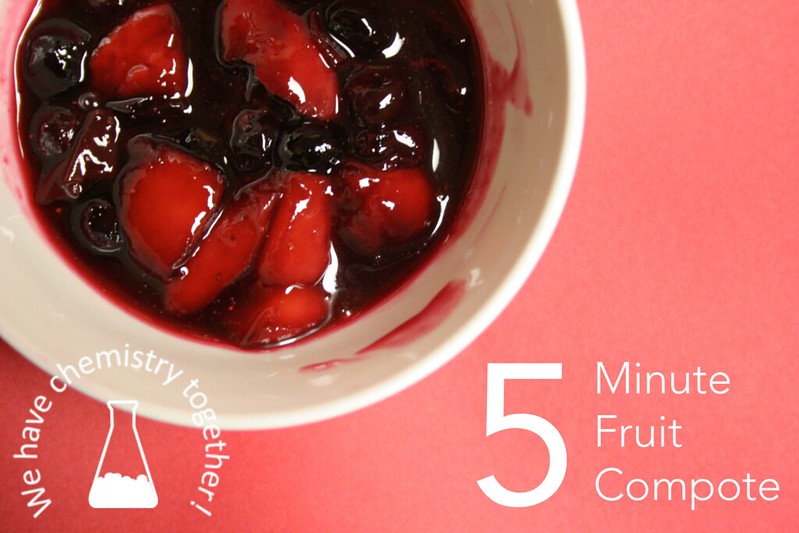
5 Minute Fruit Compote
Adapted from all over the internet; you can find similar recipes everywhere.

Ingredients
1/3 cup white sugar
1 1/2 tsp cornstarch
1 tbsp water
1 tbsp lemon juice (or another tbsp water, if you don't have it)
1 1/2 cups fresh or frozen fruit (berries and peaches are our favourites)

Directions
Add all ingredients to small saucepan. Cook over medium heat on stovetop until thickened, about 5-10 minutes. Serve warm, room temperature or even cool, depending on application.

Bonus: Want cobbler?
Mix 1 1/2 cups all purpose flour, 1/2 cup white sugar, 1 1/2 tsp baking powder, 1/2 tsp salt and 1 tsp cinnamon. Cut in one stick (8 tbsp) cold butter. Add 1/3 cup boiling water and mix well. Spoon over cooked fruit in small casserole dish, bake 20-25 minutes at 400 degrees F or until cobbler is golden and delicious.

Red Coffee Table: Finished!

Last time I wrote, I showed you the before of our coffee table refashion, and today I'm so excited to show you the after! So, without further ado...


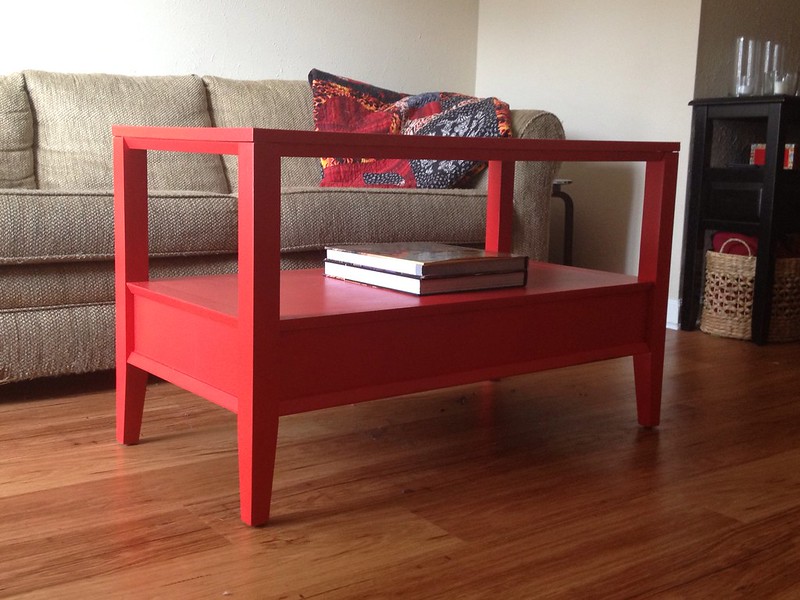
What do you think? We love how this piece turned out. To be honest, the first coat was a little dicey; the man at the paint counter warned me that this shade would need multiple coats, and he was absolutely right. The colour didn't start to come out right until after a very heavy-handed second coat, and it could probably still benefit from one more on the flat surfaces.

I'm so glad we went with such a bold colour! It really brings a new element to our living room. Now all that's left is to finish the table with a satin clear-coat and stitch up a few throw pillow covers to spruce up our sofa and chairs.

Have you made any bold decorating decisions lately?

Red Coffee Table


Hey there! It's summer time and the DIY bug bit us hard around here. There's nothing like an upcoming move to get my butt in gear toward finishing all of my little projects!


Today, I want to talk about our coffee table. Technically it's the Mister's coffee table, and I love it. It's the perfect size for our sofa, it has a lovely shape, two handy drawers (One for remotes and one for nail polish, naturally! Not shown in the picture above.) and the lower shelf is the perfect place to stash the Mister's extra-large Spiderman coffee table book and a couple of extra coasters.

I love our coffee table... but I think it could do more for us. When the Mister and I merged our furniture, we wound up with a lot of black-painted and dark-stained wood in the living room. Paired with a very beige sofa and a few beige chairs, and the whole thing comes off rather... meh. So, somewhere along the way, I got the crazy idea to paint our coffee table red.


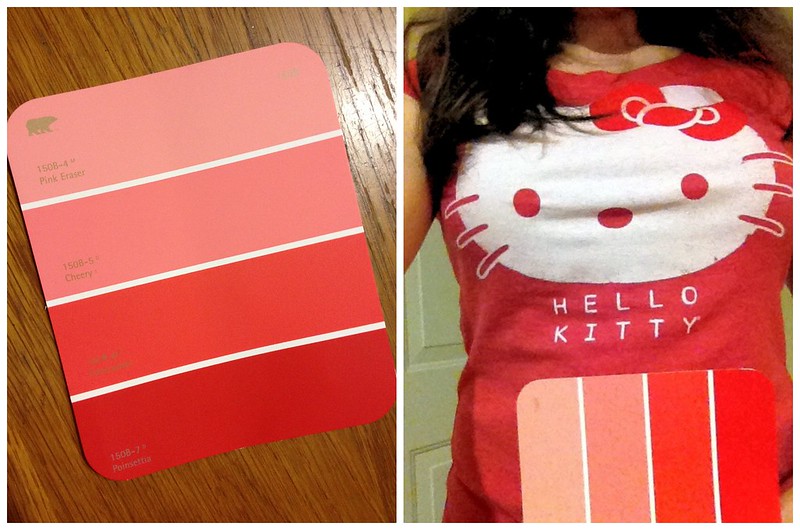
Not just any red, but perhaps the brightest shade of red Behr makes; Behr 150B-7 in "Poinsettia". It's the very bottom panel on the swatch on the left... which just happens to match my very cheery Hello Kitty tee! I really wanted to spray paint it (for speed and for the great finish that spray paint achieves on furniture) but I couldn't find a bright red spray paint in a satin sheen anywhere in town, so I went with a satin Behr interior paint and a smooth, low-nap roller.

I've been painting this table mostly at night the last few evenings, so I have very few decent pictures to show you. It ought to be done in the next couple days, though, and I'll be back to show you the after. I hope you stay tuned!

Forget-me-not

I miss you guys (again)!

I wish I could say I'm going to be back for reals now, but I wouldn't want to lie to you again.

If you're a blogger -- how do you keep up with a regular posting schedule? I'm thinking of a bribery reward system... every evening I write a post, I get ice cream. ;)

I'm really eager to hear your tips!

The Spring Breeze Tank

Last Thursday I shared with you the start of my Spring Breeze tank, and I'm happy to report that it's already done!

Spring Breezes Tank

In the end, I wound up cutting and pressing my own single fold bias tape from some white cotton I had on hand. It's such a wonderful finishing technique, and I'm so glad I went that route versus folding over the edges! Next time, though, I'll make sure to pick up one of the metal "doohickeys" I hear everyone talking about. They seem to be the best way to make bias tape aside from the Simplicity bias tape maker.

Spring Breezes Tank

Here it is worn the two ways I would probably wear it every day; tucked into an A-line denim skirt with a skinny hot pink belt, or untucked under a comfy cardigan in my favourite color, emerald green!

I apologize for the quality of these pictures, but I really wanted to show this off right away! That's what I get for only sewing after 8PM. The next time we have some great spring weather I'll try to wear this out and have the Mister snap a few extra photos!

School's Out For...ever!

I'm back! My last day of classes ever was this morning, and while I'm still a student for a few more years I'm done with that chapter of graduate school. Hooray!!!

One last time, for good measure: No more pencils, no more books, no more teacher's dirty looks!

To celebrate, I clocked about an hour and a half of sewing time tonight. While my Mister made dinner (what a guy!) I worked on two pattern pieces I drafted from a ready-to-wear (RTW) tank top I own. I had started drafting the pattern a few nights ago, tracing around the tank onto the remnants of a roll of Christmas wrapping paper. Tonight I added seam allowances and tightened things up a bit before cutting out the pattern, and after dinner I got to work cutting fabrics and sewing!

Spring Breeze Tank

This tank is mostly made from my second thrifted vintage sheet, with a small panel of jersey stolen from one of the Mister's old t-shirts on the back. The RTW tank has a jersey back and a chiffon-y front, and I figured I would follow along.

Spring Breeze Tank Collage

The pattern is honestly rather shapeless, but it's loose and breezy and it'll work great under a cardigan to spruce up my closet through the rest of Spring. That's a good thing, too, because I started looking through what I kept from last year's Spring and Summer and oh-boy, do I need some new clothes...

You've probably noticed by now that I'm showing you work-in-progress photos. I haven't cut out any bias tape to finish the neck and armholes, because I'm trying to decide if I want to cut my own from this sheet, or if I want to just pick some up at the fabric store next time I'm out. Decisions, decisions...

Well, I'm really glad to be back, and especially with a project like this! While I originally learned to sew by making clothes, I've only used my sewing machine recently for home decor, quilting, and the occasional dog toy. This is the first piece of clothing I've sewn in a very long time, and I'm really excited to keep going! Maybe I'll put together a whole closet of handmade items, like those I've seen so many other bloggers creating recently. 

What do you think, is it worth the effort? Have you made any clothes for the spring season, yet?

Literature Review: Periodic Table Quilts

In the science world, a literature review is a written work that sums up the current state of scientific research in a particular field.

After much anticipation and eager waiting, we finally got to meet the baby boy that my Mister's PI (which in the science world stands for Primary Investigator, i.e., his thesis advisor) has been gestating for the last nine months. My natural impulse was to immediately start work on a baby quilt, but what would be appropriate for the infant son of two awesome chemists? Well, why not a periodic table quilt!

My favourites from Pinterest include:


This first clean, minimal quilt left me asking, "How did they do that?" It turns out that it wasn't anything as complicated as I assumed -- this quilt was accomplished by professionally printing the periodic table onto white fabric and sashing with broad black borders.


This version is extremely similar to the first in that the fabric was printed using Spoonflower, but I love seeing that the quilter actually cut and pieced each element together to form the finished quilt top. Also, the various quilting patterns and the unique binding stitch are really worth a closer look -- make sure you click through to see the whole post at Not Only Quilts!

Source: google.com via Jessica on Pinterest

Finally, I pinned this image of Elemental, a beautiful, abstract quilt by pivy. Something about the use of only coloured blocks to imply the periodic table hit home, and I think this is the inspiration I needed for the baby quilt I'm hoping to make!

Even if you're not a chemistry geek like me, I hope you've enjoyed this little review. There are plenty of techniques described in the three examples above that could add a little something to any quilting project!