I've been on a huge homemade kick recently. The "urban homesteading" bug has totally bitten me, and while we're a long way from chickens and goats in our backyard, I'm trying to make as many of our daily necessities as possible.
So far, the list of successes includes:
Artisan Bread via Alexandra's Kitchen. I downsized the recipe to make exactly one loaf. This was so good that we ate the loaf basically in one night, and made another not even a week later. We'll probably use this recipe, split into two smaller loaves, to make bread bowls for soup once the weather turns colder!
White Sandwich Bread via The Baker Upstairs. Again, I downsized the recipe for just one loaf. Thank goodness I've got a stand mixer; there's no way I would have had the energy to knead this thing for 10 minutes! This was delicious, and we ate toast every morning for almost a week with a thick slather of butter and some homemade, No-Pectin Peach Jam that I made up from our CSA peaches. (If you've been taking notes, that peach jam recipe is basically a fruit compote that gets cooked all the way down!)
Last but not least, here's a great recipe for Homemade Chocolate Syrup. Chocolate milk is an absolute staple of my diet; I grew up in a house where the refrigerator always contained Hershey's syrup, and I've definitely caught my dad pouring milk into the Hershey's bottle to get out the last little bit of chocolate. I'm so glad I learned how to make this myself, because it is so easy and so, so good! Just definitely heed the warning and make it up in a 3 quart pot; it foams up quite a bit as it boils.
What have you made lately? I'd love to see your creations and add a few more recipes to my repertoire. Comment below with your links!
Showing posts with label DIY. Show all posts
Red Coffee Table: Finished!
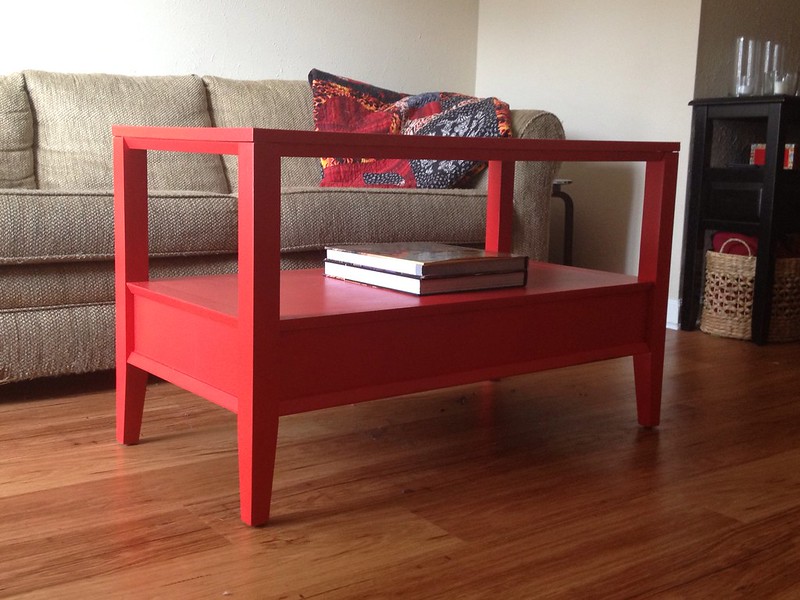
Last time I wrote, I showed you the before of our coffee table refashion, and today I'm so excited to show you the after! So, without further ado...

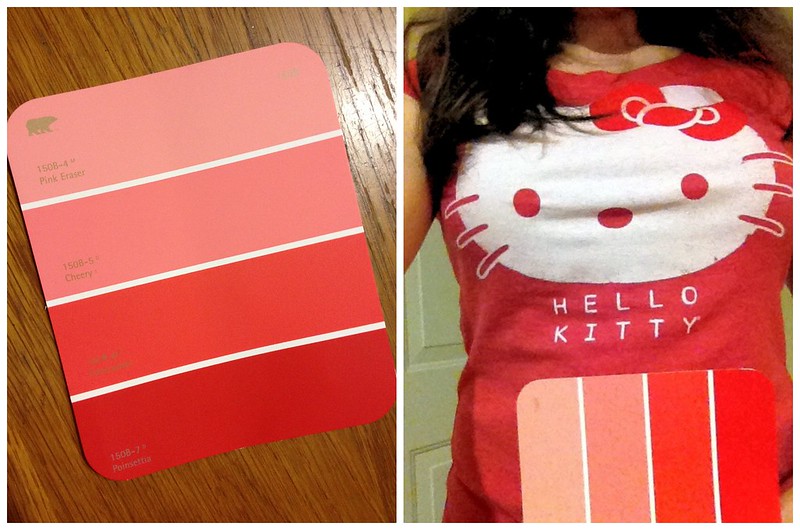
What do you think? We love how this piece turned out. To be honest, the first coat was a little dicey; the man at the paint counter warned me that this shade would need multiple coats, and he was absolutely right. The colour didn't start to come out right until after a very heavy-handed second coat, and it could probably still benefit from one more on the flat surfaces.
I'm so glad we went with such a bold colour! It really brings a new element to our living room. Now all that's left is to finish the table with a satin clear-coat and stitch up a few throw pillow covers to spruce up our sofa and chairs.
Have you made any bold decorating decisions lately?

What do you think? We love how this piece turned out. To be honest, the first coat was a little dicey; the man at the paint counter warned me that this shade would need multiple coats, and he was absolutely right. The colour didn't start to come out right until after a very heavy-handed second coat, and it could probably still benefit from one more on the flat surfaces.
I'm so glad we went with such a bold colour! It really brings a new element to our living room. Now all that's left is to finish the table with a satin clear-coat and stitch up a few throw pillow covers to spruce up our sofa and chairs.
Have you made any bold decorating decisions lately?
Labels:
DIY,
furniture,
home decor
Red Coffee Table
Hey there! It's summer time and the DIY bug bit us hard around here. There's nothing like an upcoming move to get my butt in gear toward finishing all of my little projects!
Today, I want to talk about our coffee table. Technically it's the Mister's coffee table, and I love it. It's the perfect size for our sofa, it has a lovely shape, two handy drawers (One for remotes and one for nail polish, naturally! Not shown in the picture above.) and the lower shelf is the perfect place to stash the Mister's extra-large Spiderman coffee table book and a couple of extra coasters.
I love our coffee table... but I think it could do more for us. When the Mister and I merged our furniture, we wound up with a lot of black-painted and dark-stained wood in the living room. Paired with a very beige sofa and a few beige chairs, and the whole thing comes off rather... meh. So, somewhere along the way, I got the crazy idea to paint our coffee table red.
I've been painting this table mostly at night the last few evenings, so I have very few decent pictures to show you. It ought to be done in the next couple days, though, and I'll be back to show you the after. I hope you stay tuned!
Labels:
DIY,
found it on pinterest,
furniture,
home decor
The Spring Breeze Tank
Last Thursday I shared with you the start of my Spring Breeze tank, and I'm happy to report that it's already done!
In the end, I wound up cutting and pressing my own single fold bias tape from some white cotton I had on hand. It's such a wonderful finishing technique, and I'm so glad I went that route versus folding over the edges! Next time, though, I'll make sure to pick up one of the metal "doohickeys" I hear everyone talking about. They seem to be the best way to make bias tape aside from the Simplicity bias tape maker.
Here it is worn the two ways I would probably wear it every day; tucked into an A-line denim skirt with a skinny hot pink belt, or untucked under a comfy cardigan in my favourite color, emerald green!
I apologize for the quality of these pictures, but I really wanted to show this off right away! That's what I get for only sewing after 8PM. The next time we have some great spring weather I'll try to wear this out and have the Mister snap a few extra photos!
In the end, I wound up cutting and pressing my own single fold bias tape from some white cotton I had on hand. It's such a wonderful finishing technique, and I'm so glad I went that route versus folding over the edges! Next time, though, I'll make sure to pick up one of the metal "doohickeys" I hear everyone talking about. They seem to be the best way to make bias tape aside from the Simplicity bias tape maker.
Here it is worn the two ways I would probably wear it every day; tucked into an A-line denim skirt with a skinny hot pink belt, or untucked under a comfy cardigan in my favourite color, emerald green!
I apologize for the quality of these pictures, but I really wanted to show this off right away! That's what I get for only sewing after 8PM. The next time we have some great spring weather I'll try to wear this out and have the Mister snap a few extra photos!
Labels:
DIY,
sewing,
threadbias,
thrifting,
vintage sheets
A Cozy Sewing Nook
Happy New Year! 2013 has gotten off to an incredible start, and I'm glad for it. The Mister and I spent the morning starting some larger organizing projects, and I'm glad to see that we're finally getting the house back in order. It was looking pretty rough after last semester!
One of my big personal projects was to create a dedicated sewing and crafting space for myself. I've been inspired by many resources, but mostly this pin here:
The Mister and I recently moved into a new two bedroom apartment. We're using the second bedroom as a guest room, and I finally asked if I could "have" the closet for my own uses. The Mister agreed, provided I could find ample storage for everything we werehoarding keeping in the space. That was all I needed to hear -- as soon as we got home, I unpacked all of the stuff from the closet and got started! (And yes, it's all still sitting on the floor behind me. I'll clean it up. Someday.)
Here's where my progress is at as of tonight:
One of my big personal projects was to create a dedicated sewing and crafting space for myself. I've been inspired by many resources, but mostly this pin here:
The Mister and I recently moved into a new two bedroom apartment. We're using the second bedroom as a guest room, and I finally asked if I could "have" the closet for my own uses. The Mister agreed, provided I could find ample storage for everything we were
Here's where my progress is at as of tonight:
While it's not quite the same, I'm really pleased with it! We didn't install a countertop as they did in the inspiration picture because, well, we're renting. Instead, I played around with surfaces before settling on a folding table. This one is 4 feet long by 20" deep and it fits perfectly within a standard closet. It's the only thing I'm not entirely pleased with; I feel like the table has too much play, and when the sewing machine gets moving quickly the table tends to rock pretty badly. I'll need to solve that problem before tackling any large projects, and that table will definitely be the first thing to go if I can find a great desk while thrifting!
To the right are a couple of plastic drawer systems, stacked vertically to hold miscellaneous odds and ends for each of my crafting habits. I've also put up a corkboard to hold my current inspirations (or pattern details) and a pretty cross stitch alphabet sampler I found while thrifting a few weekends ago. I'm waiting on hardware to hang my new 60-spool thread holder, and other than that I'm done! My goal was simply to get this in working order; I'm going to try to leave myself some blank space so I can collect pretty inspirations and grow into the nook over time.
I have my little ironing station on another wall of the room. It may seem like a bit of a pain to travel every time I want to press a seam, but I have terrible luck around hot irons and plenty of scars to prove it. Also, this gives me plenty of room to set up my laptop or iPad near my sewing machine so I can watch Netflix blog while I work!
If you're looking to set up your own sewing nook, I highly recommend trying something like this. The table, plastic drawer organizers and cork board were all purchased at a local Walmart for less than $100! This layout also provides plenty of space to each side of the table for storage, and the closet doors close easily even with a chair tucked under the table.
Have you got a sewing nook in your home? Is it a closet like this, or a full blown sewing room? Leave me a comment below! I'd love to see how you have your space organized -- I'm always looking for new ideas.
Labels:
DIY,
organization,
sewing,
thrifting
Thrifted nightstand
About a year and a half ago I rescued this little nightstand from my neighborhood thrift shop. The sticker is long gone, but I believe I paid $8 for it. I have a tall dresser with a similar design, and I knew I could refinish this piece to fit into my every day life.
A month after purchasing the nightstand, my mister (although then he was only my fiance) and I made our move to Tennessee. Days before departing, while I was packing up the rest of my house, I decided to finally refinish the nightstand. (Totally logical.) After a coat of Rustoleum white primer and two coats of gray paint, it became this:
(Boy, do I miss that yard.)
Since then we got married and moved in together, and this poor little nightstand got sent away to the guest room, never to be seen again. It just didn't work with the dark bedroom furniture my mister brought with him, but I couldn't bear to part with it. I actually wound up without a nightstand of my own after that. Then yesterday, I was "shopping at home" and redecorating a few rooms of the house when it finally hit me. I could refinish this piece again, and then I'd get to enjoy it every day! Two coats of black satin spray paint later, and...
Truth be told, it looks better in person than it does in that photo. I love how the finish just seems to glow, and the black really makes the lines of this piece stand out! Once I get the rest of our room squared away, I'll be sure to get a better shot.
Do you have a favourite piece of art or furniture that you've sequestered away in another room of your house? Try reworking it so that it can be a part of your daily life!
Labels:
DIY,
furniture,
home decor,
thrifting
Subscribe to:
Posts (Atom)