Confessions


In an effort to find my voice (and also to never give off the appearance that our lives are perfect) I thought I'd confess a few things:

1) I'm writing this post on Friday, even though I'm scheduling it to post on Sunday. I doubt I'll have time to post again over the weekend, and I have a writing bug now, so I thought I'd knock out a few posts for the future.


2) I haven't changed out of my PJs all day. (We're wrapping up Honeymoon #2, and when you only get a vacation once or twice a year, you make the best of it!)

3) I buy chocolate chips just so I can eat them right out of the bag. You heard me. I never make chocolate chip cookies. I just eat the chips.


4) Chocolate chip cookies are the only type of cookie I don't make. I've never been able to make them as well as my mom can, so I don't bother. (If you have a killer chocolate chip cookie recipe, I'd love to try it! Let me know in the comments.)

5) Left up to my own devices, I'd probably eat nothing but Ramen. I cook to feed my Mister.


6) My Mister turn on the hall light every time he walks past the switch. I turn it off every time I walk past the switch. I find this endearing and frustrating in equal measure.

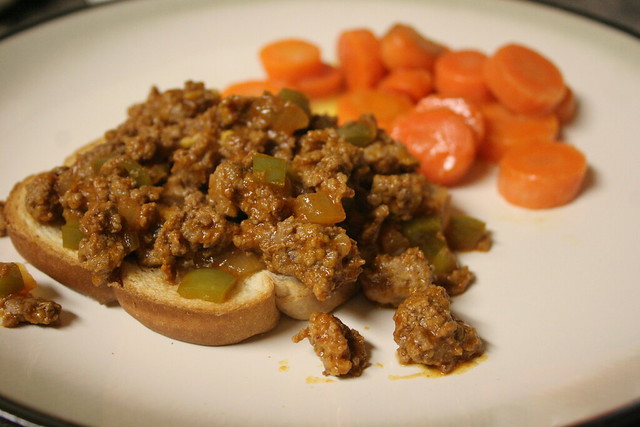
7) Sloppy joe recipe found at My Healthy Ohana. I don't usually like Sloppy Joes but these are delicious, probably because she uses siracha.  We're obsessed with siracha in this house, and at any given time we've probably got two or three open bottles.

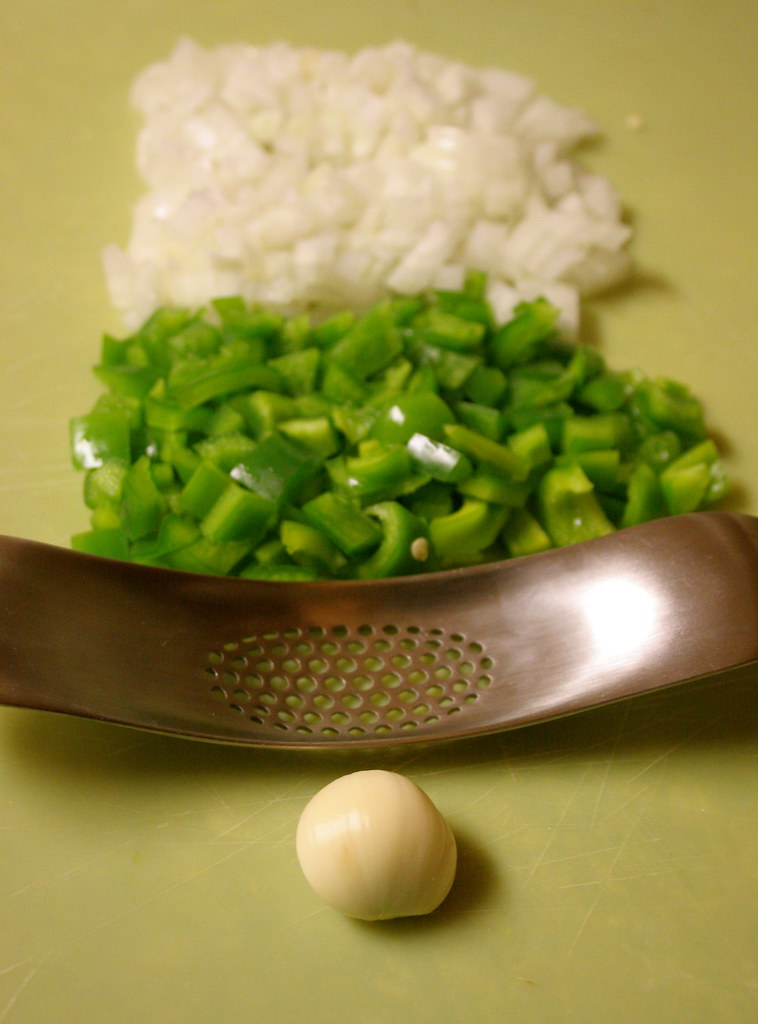
8) The Joseph Joseph Garlic Rocker pictured above was found on Amazon.com. I am obsessed with this thing, and absolutely not paid to say so. Buy one. Buy a few and give them as hostess gifts! You'll thank me later.

Finding My Voice

If I've learned anything about blogging over the last few years, it's this: blogging is difficult. It's time consuming. And it's easy to lose focus.

I think that's where I am now. Out of focus. I've forgotten my original intention for this space, and it shows. When I sit to write something I come up empty. That's not to say that I have nothing to write; quite the opposite! I have so much to say, and perhaps I should say it here.

So, what is this blog about? Let's see... well, it began with Chemistry.

Okay, not really. It began with Physics, and a guy (he's a chemist, at least). A chance encounter after showing up tardy to class, sitting at a lab table that wasn't my usual spot. Later that semester, we went for drinks. After the final exam, a hug. After graduation we worked together in the same chemistry lab. We became inseparable.

A couple of years later he proposed. We got into the same graduate school (he's still a chemist, and I'm doing computational structural biology) and moved to Nashville. We got married and became roommates. We're learning to live together in the midst of this crazy thing called graduate school. And we're loving it! (Most days.)

So, perhaps that's what this is all about -- we have chemistry together. Our life isn't like most others, but it's not so different either. It's stressful and we work too hard (and don't get us started about the pay!) but we're finding ways to laugh and celebrate this mess we've gotten ourselves into. And I want to bring you along for the ride.

So! Here's to finding my focus. Thanks for letting me ramble, I needed it!

///

For more thoughts from around the web, see this post: "Why Keep Going?" I think Jenny hit the nail on the head with her description of the despair and hope that push and pull a graduate student throughout their career. It's a question every grad student asks at some point, and I think she's summed up a beautiful answer.

CSA Week 7


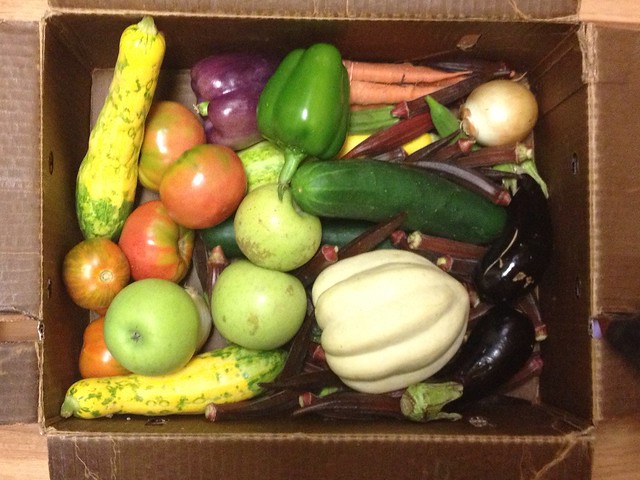
Welcome to another week of CSA food, complete with.... (drumroll please) ....more okra! Luckily I was prepared, and I put up four jars of refrigerator pickles using this recipe from Honest Fare. Slime free okra? I'm in!


Here's the box reveal. As soon as I saw those lovely little eggplants, I immediately started looking up a good eggplant stir fry. We love the eggplant at P.F. Changs, but this Thai Basil Eggplant recipe might be even better!

Make It Yourself

I've been on a huge homemade kick recently. The "urban homesteading" bug has totally bitten me, and while we're a long way from chickens and goats in our backyard, I'm trying to make as many of our daily necessities as possible.

So far, the list of successes includes:


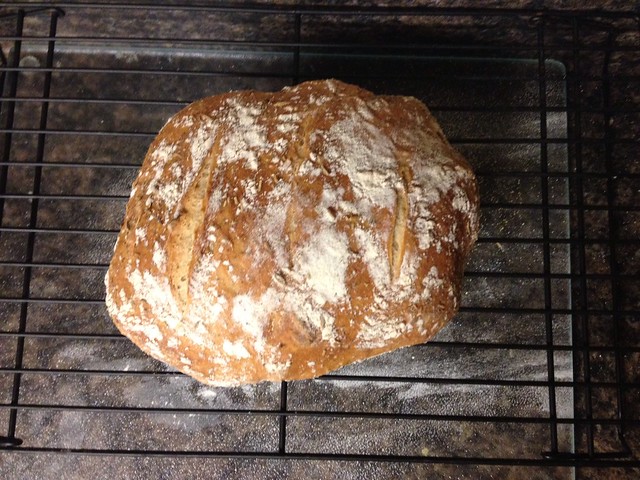
Artisan Bread via Alexandra's Kitchen. I downsized the recipe to make exactly one loaf. This was so good that we ate the loaf basically in one night, and made another not even a week later. We'll probably use this recipe, split into two smaller loaves, to make bread bowls for soup once the weather turns colder!


White Sandwich Bread via The Baker Upstairs. Again, I downsized the recipe for just one loaf. Thank goodness I've got a stand mixer; there's no way I would have had the energy to knead this thing for 10 minutes! This was delicious, and we ate toast every morning for almost a week with a thick slather of butter and some homemade, No-Pectin Peach Jam that I made up from our CSA peaches. (If you've been taking notes, that peach jam recipe is basically a fruit compote that gets cooked all the way down!)


Last but not least, here's a great recipe for Homemade Chocolate Syrup. Chocolate milk is an absolute staple of my diet; I grew up in a house where the refrigerator always contained Hershey's syrup, and I've definitely caught my dad pouring milk into the Hershey's bottle to get out the last little bit of chocolate. I'm so glad I learned how to make this myself, because it is so easy and so, so good! Just definitely heed the warning and make it up in a 3 quart pot; it foams up quite a bit as it boils.

What have you made lately? I'd love to see your creations and add a few more recipes to my repertoire. Comment below with your links!

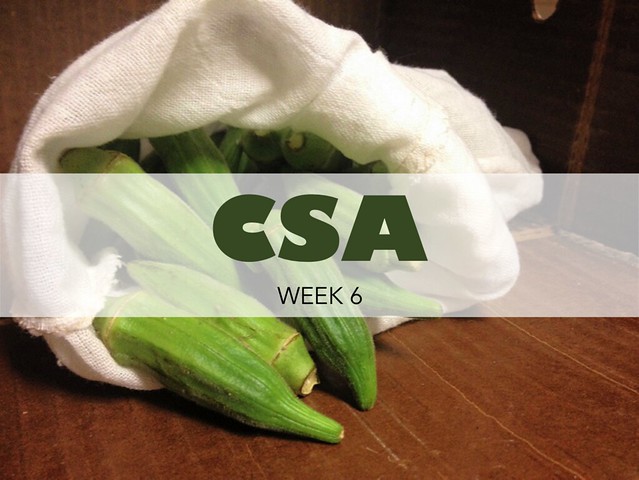
CSA Week 6


Well, it's finally happened. All summer long I've waited for the day that we open our box to find it -- that green, fuzzy oddity, okra.

I've got to be perfectly honest... I've never eaten okra in my life. Horror stories of mucus-y, slimy dishes have steered me away. When I first considered registering for our CSA I looked at the season calendar, saw the weeks and weeks of okra, and immediately changed my mind. Once we registered I thought we would receive nothing but okra starting immediately, but it took the farmers 6 weeks before they delivered.


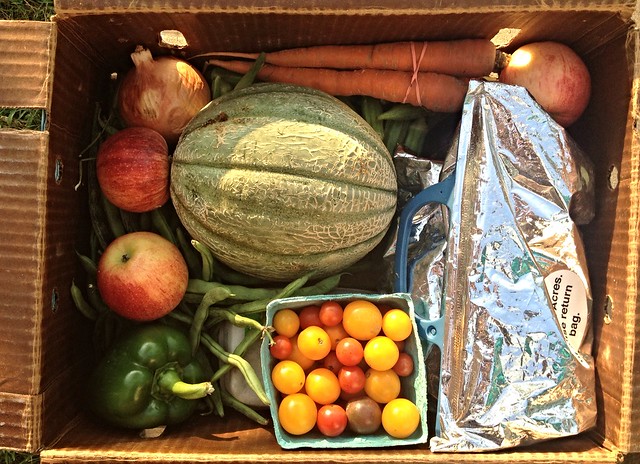
Here's the grand box reveal; see how they've hidden the okra down in the bottom? Sneaky!

Well, here goes. I need some help; anyone have any good okra recipes I should try?

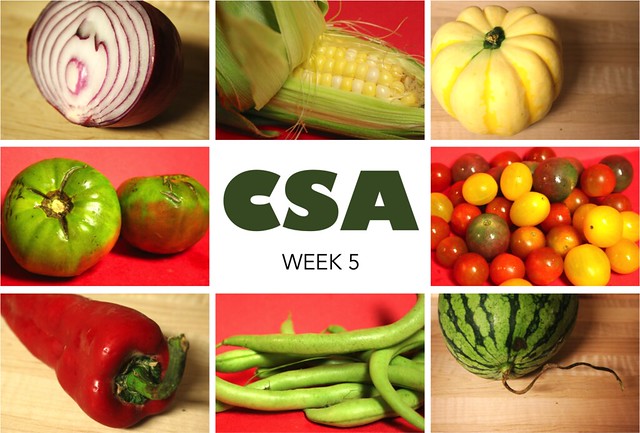
CSA Week 5: Seasons Change

Hey everyone! I'm back for another CSA box reveal.


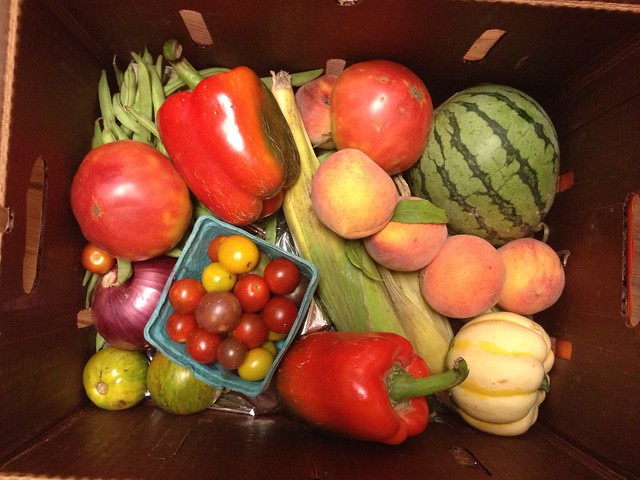
Ready or not, here's the reveal:


This week the weather here in Nashville started to change, and glimpsing into this farm box made me wistful for the coming Fall season. The box this week contained bell peppers, a red onion, an adorable little squash, another white-fleshed watermelon, four (four!) ears of corn, and yet more green beans. Also, tucked underneath it all, is a half-dozen eggs that we were warned we may not receive because the chickens have gone into an early molt at the farm.

Did you know chickens molt twice a year, and that hens won't lay while they're going through the process? I didn't! I'm so glad the man who runs our CSA is dedicated to education; we get a detailed email every week describing conditions on the farm, and he also includes tips and tricks to help us enjoy our bounty. It was an unexpected treat that I've come to look forward to every week!

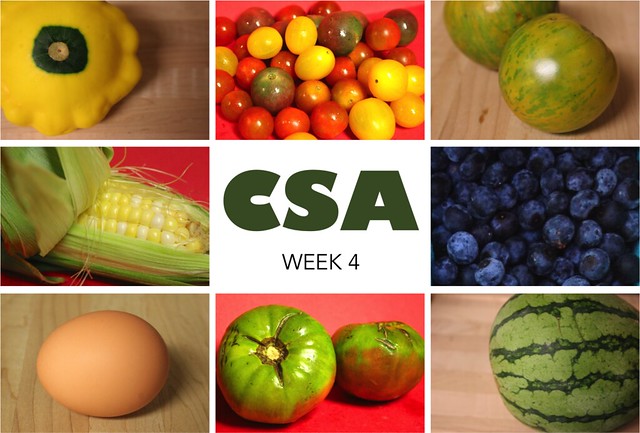
CSA Week 4: We're Back!

Hey! Sorry for disappearing with no notice: I got to spend the last week in Seattle at a conference! A few years ago I got to spend a whole summer in the Pacific Northwest and I fell head-over-heels in love with Seattle. In case you ever get to go, don't miss out on the Pike Brewing Company, located in the Pike Place Market. Their soft pretzel comes with the most amazing homemade mustard, which I had along with a cup of the clam chowder for lunch one afternoon. Gosh, just writing about it makes me want to go back!

 Anyway, I digress. This week's CSA box reveal will be a short post, because my Mister received and consumed our Week 3 box entirely without me and I have no idea what it contained -- hah!


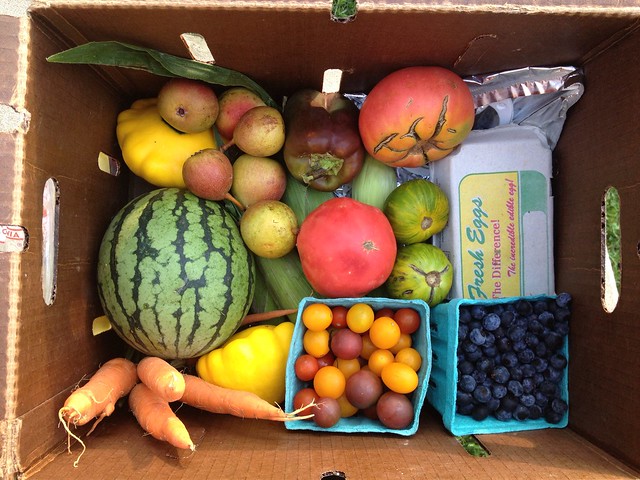
Here's the birds eye shot of our Week 4 box... so many goodies!


New produce this week: patty pan squash, blueberries, bell peppers, pears and a little watermelon! We've also been blessed by two gorgeous rib-eye steaks. Looks like we'll be eating well this week!

CSA Week 2: Onions and peaches and carrots, oh my!

We made it through our first CSA week and we're on to the second!


Without further ado, here's the contents of box 2:


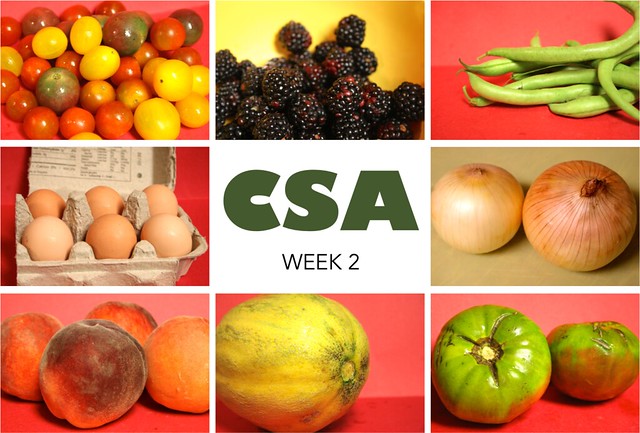
Looks about the same as last week, with a few minor differences! We received carrots and onions this week, along with an assortment of familiar produce. Instead of a whole chicken, it looks like we'll be cooking pork chops! And sure enough, buried in that box are another half-dozen eggs, safely tucked away.

So, you may be wondering what came of the first box! Well, here's the rundown from Week 1:

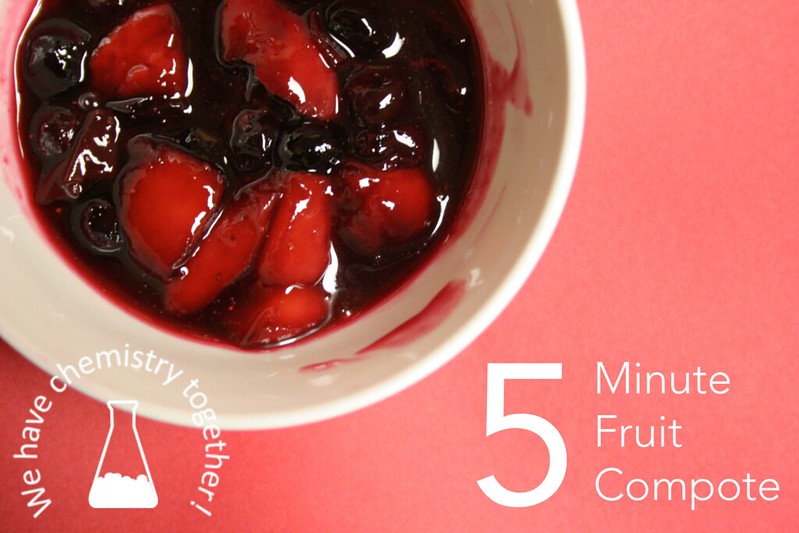
The blackberries and one peach became toppings for ice cream following my 5 Minute Fruit Compote recipe.

The chicken was dutifully roasted following the instructions described here.

Summer corn is so sweet that it needs very little more than a five minute blanch in boiling water and a pat of good, salty butter!

We always cook green beans in a manner similar to Outback Steakhouse: an eight minute blanch in boiling water, followed by a toss in a hot pan with butter, cinnamon, a tiny pinch of brown sugar, garlic powder and a healthy dose of white pepper.

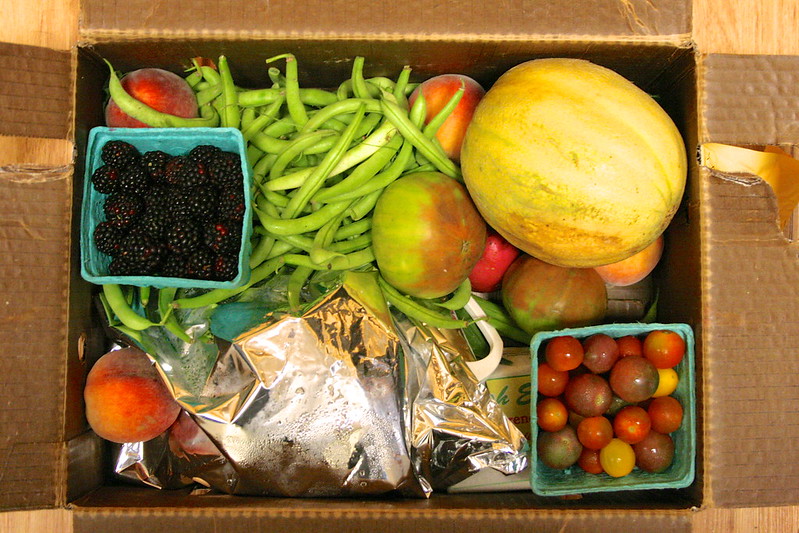
The rest of the produce was eaten pretty much out-of-hand. That melon had a wonderful orange interior and sweet flavour similar to a cantaloupe; I'd love to know what variety it was. Luckily we got another one to enjoy this week!

CSA Week 1: What's In The Box?

There's a farmer's market that gathers right on campus every week in the summer, and my Mister and I have loved shopping the local produce. This summer we're going a step further and joining a CSA! 


Community-supported agriculture is something I've never heard about before, but the system is pretty straightforward: you pay in to help support a farming community, and they share of their bounty by providing a weekly food box of delicious, seasonal, local produce!


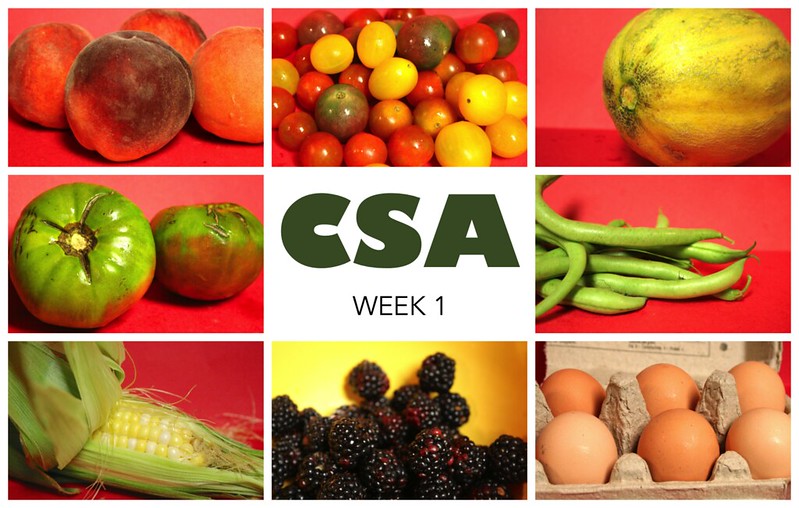
This is our first box. We registered to receive both produce and meat, and every week we expect about 1/4 bushel of produce, a single portion of meat and half a dozen eggs. This week, as you can see, we made out quite nicely. We've got plenty of fruit in the form of peaches, a melon and blackberries -- yum! Also, we have potatoes, green beans, sweet corn and a variety of tomatoes. We also lucked out on the meat portion and got a whole roasting chicken, woo hoo!

Since this is our first week, I really don't have much more to tell you. But check back next week to find out how we used this box, and to see a sneak-peek of next week's harvest!

5 Minute Fruit Compote


Summertime in these parts is hot. Not the good summer vacation kind of hot either, but the sticky, miserable, fanning yourself while sipping iced beverages because the AC just can't handle it type of hot. 

You know that line, "If you can't stand the heat stay out of the kitchen?" Yeah, after 30 minutes over an oven trying to put together a weeknight dinner, there are very few reasons I'd stay a bit longer. This dessert, however, is one of them.


Fruit compote is one of those things that makes everything a little bit better. Spoon it over waffles and claim it's breakfast. Add a scoop of ice cream (or, as we like, a spoonful of Cool Whip) and call it dessert. Drop dough over it and bake for a cobbler that will have everyone begging you for the recipe. And the best part? It comes together in five minutes on your stovetop, and dirties exactly one pan.

Go! Hurry! Make it now! I'll bet you've even got the ingredients floating around your kitchen already!

5 Minute Fruit Compote
Adapted from all over the internet; you can find similar recipes everywhere.

Ingredients
1/3 cup white sugar
1 1/2 tsp cornstarch
1 tbsp water
1 tbsp lemon juice (or another tbsp water, if you don't have it)
1 1/2 cups fresh or frozen fruit (berries and peaches are our favourites)

Directions
Add all ingredients to small saucepan. Cook over medium heat on stovetop until thickened, about 5-10 minutes. Serve warm, room temperature or even cool, depending on application.

Bonus: Want cobbler?
Mix 1 1/2 cups all purpose flour, 1/2 cup white sugar, 1 1/2 tsp baking powder, 1/2 tsp salt and 1 tsp cinnamon. Cut in one stick (8 tbsp) cold butter. Add 1/3 cup boiling water and mix well. Spoon over cooked fruit in small casserole dish, bake 20-25 minutes at 400 degrees F or until cobbler is golden and delicious.

Red Coffee Table: Finished!

Last time I wrote, I showed you the before of our coffee table refashion, and today I'm so excited to show you the after! So, without further ado...


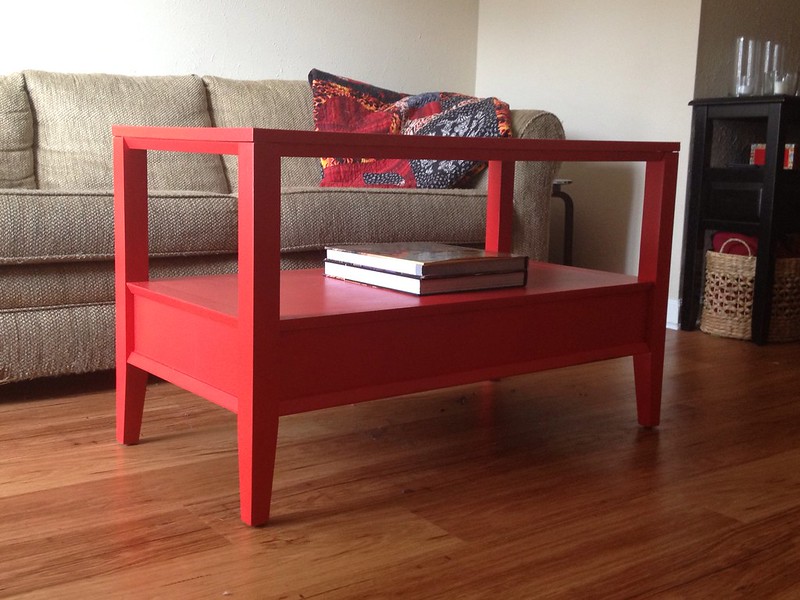
What do you think? We love how this piece turned out. To be honest, the first coat was a little dicey; the man at the paint counter warned me that this shade would need multiple coats, and he was absolutely right. The colour didn't start to come out right until after a very heavy-handed second coat, and it could probably still benefit from one more on the flat surfaces.

I'm so glad we went with such a bold colour! It really brings a new element to our living room. Now all that's left is to finish the table with a satin clear-coat and stitch up a few throw pillow covers to spruce up our sofa and chairs.

Have you made any bold decorating decisions lately?

Red Coffee Table


Hey there! It's summer time and the DIY bug bit us hard around here. There's nothing like an upcoming move to get my butt in gear toward finishing all of my little projects!


Today, I want to talk about our coffee table. Technically it's the Mister's coffee table, and I love it. It's the perfect size for our sofa, it has a lovely shape, two handy drawers (One for remotes and one for nail polish, naturally! Not shown in the picture above.) and the lower shelf is the perfect place to stash the Mister's extra-large Spiderman coffee table book and a couple of extra coasters.

I love our coffee table... but I think it could do more for us. When the Mister and I merged our furniture, we wound up with a lot of black-painted and dark-stained wood in the living room. Paired with a very beige sofa and a few beige chairs, and the whole thing comes off rather... meh. So, somewhere along the way, I got the crazy idea to paint our coffee table red.


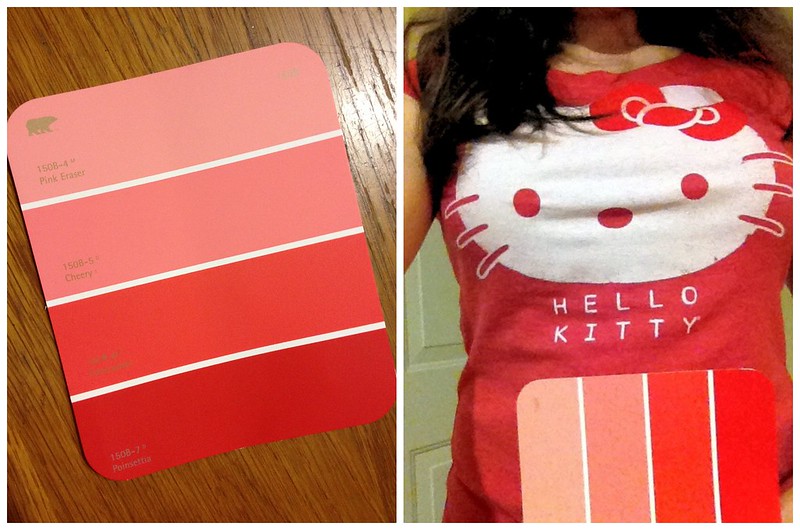
Not just any red, but perhaps the brightest shade of red Behr makes; Behr 150B-7 in "Poinsettia". It's the very bottom panel on the swatch on the left... which just happens to match my very cheery Hello Kitty tee! I really wanted to spray paint it (for speed and for the great finish that spray paint achieves on furniture) but I couldn't find a bright red spray paint in a satin sheen anywhere in town, so I went with a satin Behr interior paint and a smooth, low-nap roller.

I've been painting this table mostly at night the last few evenings, so I have very few decent pictures to show you. It ought to be done in the next couple days, though, and I'll be back to show you the after. I hope you stay tuned!

Forget-me-not

I miss you guys (again)!

I wish I could say I'm going to be back for reals now, but I wouldn't want to lie to you again.

If you're a blogger -- how do you keep up with a regular posting schedule? I'm thinking of a bribery reward system... every evening I write a post, I get ice cream. ;)

I'm really eager to hear your tips!

The Spring Breeze Tank

Last Thursday I shared with you the start of my Spring Breeze tank, and I'm happy to report that it's already done!

Spring Breezes Tank

In the end, I wound up cutting and pressing my own single fold bias tape from some white cotton I had on hand. It's such a wonderful finishing technique, and I'm so glad I went that route versus folding over the edges! Next time, though, I'll make sure to pick up one of the metal "doohickeys" I hear everyone talking about. They seem to be the best way to make bias tape aside from the Simplicity bias tape maker.

Spring Breezes Tank

Here it is worn the two ways I would probably wear it every day; tucked into an A-line denim skirt with a skinny hot pink belt, or untucked under a comfy cardigan in my favourite color, emerald green!

I apologize for the quality of these pictures, but I really wanted to show this off right away! That's what I get for only sewing after 8PM. The next time we have some great spring weather I'll try to wear this out and have the Mister snap a few extra photos!

School's Out For...ever!

I'm back! My last day of classes ever was this morning, and while I'm still a student for a few more years I'm done with that chapter of graduate school. Hooray!!!

One last time, for good measure: No more pencils, no more books, no more teacher's dirty looks!

To celebrate, I clocked about an hour and a half of sewing time tonight. While my Mister made dinner (what a guy!) I worked on two pattern pieces I drafted from a ready-to-wear (RTW) tank top I own. I had started drafting the pattern a few nights ago, tracing around the tank onto the remnants of a roll of Christmas wrapping paper. Tonight I added seam allowances and tightened things up a bit before cutting out the pattern, and after dinner I got to work cutting fabrics and sewing!

Spring Breeze Tank

This tank is mostly made from my second thrifted vintage sheet, with a small panel of jersey stolen from one of the Mister's old t-shirts on the back. The RTW tank has a jersey back and a chiffon-y front, and I figured I would follow along.

Spring Breeze Tank Collage

The pattern is honestly rather shapeless, but it's loose and breezy and it'll work great under a cardigan to spruce up my closet through the rest of Spring. That's a good thing, too, because I started looking through what I kept from last year's Spring and Summer and oh-boy, do I need some new clothes...

You've probably noticed by now that I'm showing you work-in-progress photos. I haven't cut out any bias tape to finish the neck and armholes, because I'm trying to decide if I want to cut my own from this sheet, or if I want to just pick some up at the fabric store next time I'm out. Decisions, decisions...

Well, I'm really glad to be back, and especially with a project like this! While I originally learned to sew by making clothes, I've only used my sewing machine recently for home decor, quilting, and the occasional dog toy. This is the first piece of clothing I've sewn in a very long time, and I'm really excited to keep going! Maybe I'll put together a whole closet of handmade items, like those I've seen so many other bloggers creating recently. 

What do you think, is it worth the effort? Have you made any clothes for the spring season, yet?

Literature Review: Periodic Table Quilts

In the science world, a literature review is a written work that sums up the current state of scientific research in a particular field.

After much anticipation and eager waiting, we finally got to meet the baby boy that my Mister's PI (which in the science world stands for Primary Investigator, i.e., his thesis advisor) has been gestating for the last nine months. My natural impulse was to immediately start work on a baby quilt, but what would be appropriate for the infant son of two awesome chemists? Well, why not a periodic table quilt!

My favourites from Pinterest include:


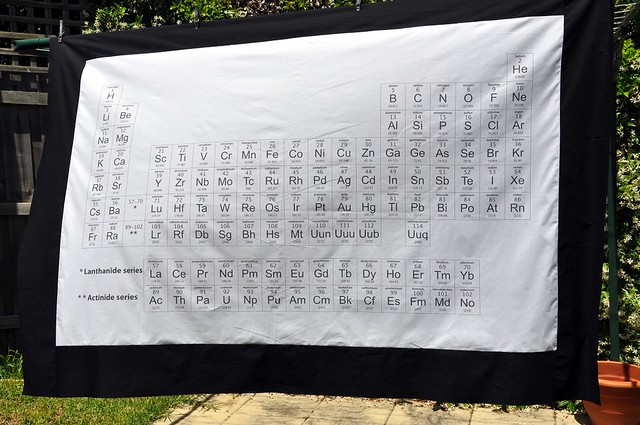
This first clean, minimal quilt left me asking, "How did they do that?" It turns out that it wasn't anything as complicated as I assumed -- this quilt was accomplished by professionally printing the periodic table onto white fabric and sashing with broad black borders.


This version is extremely similar to the first in that the fabric was printed using Spoonflower, but I love seeing that the quilter actually cut and pieced each element together to form the finished quilt top. Also, the various quilting patterns and the unique binding stitch are really worth a closer look -- make sure you click through to see the whole post at Not Only Quilts!

Source: google.com via Jessica on Pinterest

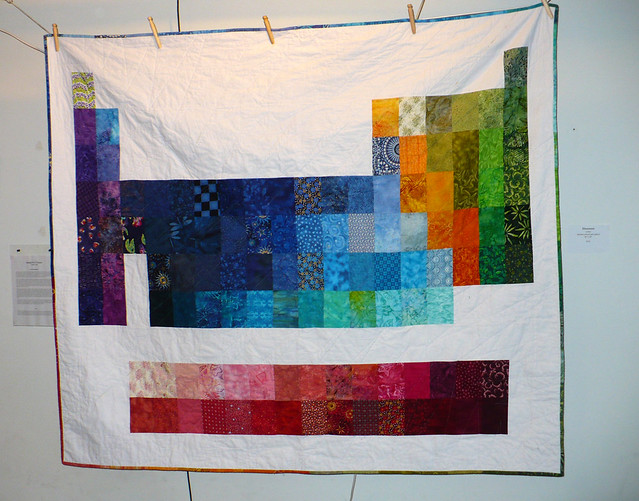
Finally, I pinned this image of Elemental, a beautiful, abstract quilt by pivy. Something about the use of only coloured blocks to imply the periodic table hit home, and I think this is the inspiration I needed for the baby quilt I'm hoping to make!

Even if you're not a chemistry geek like me, I hope you've enjoyed this little review. There are plenty of techniques described in the three examples above that could add a little something to any quilting project!

Sunday Surprise

My Mister is such an amazing man. He puts up with all of my quirks -- my love of chocolate, my multitude of crafting addictions hobbies, my tendency to dance along to the music they pump into grocery stores and shopping malls, and my weird peel-off face masks. He even takes me to Goodwill after church most Sundays so I can peruse the furniture section and dawdle by the lamps.

This Sunday was no different. While I decided to pass on the lime green computer desk, I did come away with one surprising find -- my first vintage sheet!

If you're a fan of In Color Order, you may know about Jeni's love of vintage sheets. I can honestly say that I didn't know much about vintage sheets before now, but I've always loved the photos Jeni posts of her finds -- pretty stacks of bright, colourful floral fabrics that I would love to work into my quilts but that I can never seem to find. That is, until today.


I bought this sheet today just because I loved the bright, cheerful print. Once I got home I started doing some homework to see just what I had found, and I came across this post about vintage sheets that Jeni wrote which serves as a great primer if you don't know much about the topic. I read Jeni's post and immediately went hunting for the tags on this fitted sheet. Here's what I found:


Surprise, this sheet is actually vintage! In fact, if you Google "Fieldcrest Perfection vintage sheet" you can find a number of copycat sheets, including some for sale on Etsy. Hooray, my gut instinct was right after all!

I'm excited to get this sheet washed and pressed, and then I need to decide what I'm going to do with it. Something tells me it might be more fun to break into my first vintage sheet with friends, so keep an eye out as I might be giving away a few fat quarter cuts from this sheet in the future!

Lone Starburst Paper Piecing

Tonight during #talknt I'm working on a new technique: paper piecing! I've had four pages of the Lone Starburst by Six White Horses Studio sitting on my desk for weeks, and I've finally mustered up the courage to get started.


I'm working in bright, super saturated colors broken up with a delicate white-on-white pattern, with solid white in the center of the star. I was going to invert this, with a colourful star and white backing until I saw this pin today and knew I just had to have one of my very own:


Lone Starburst closeup

I have no idea why I put off paper piecing for so long -- it's easy and entirely addictive. I've got to go, #talknt is calling and I've got more blocks to sew!

Brownie in a Mug

This is just a quick post, because I'm burning to show you the details of my first sewing completion of 2013 but since it's a surprise late Christmas gift for a dear friend, I have to keep it a secret a little while longer. Instead, here's some chocolate!

Mug Brownie

This is a brownie in a mug (and some strawberry ice cream for good measure). Believe it or not, I've never even heard of these before. That's a good thing, too, because I'd be about 20 pounds heavier had I known of these earlier! But thanks to Pinterest, these are now a part of my life. The original pin can be found here!

The idea is simple. Blend a few dry ingredients (sugar, flour, salt, cocoa powder) in a standard sized mug. Add a little oil and water, and microwave for a minute and 40 seconds. Top with ice cream and indulge your chocolate craving!

A Cozy Sewing Nook

Happy New Year! 2013 has gotten off to an incredible start, and I'm glad for it. The Mister and I spent the morning starting some larger organizing projects, and I'm glad to see that we're finally getting the house back in order. It was looking pretty rough after last semester!

One of my big personal projects was to create a dedicated sewing and crafting space for myself. I've been inspired by many resources, but mostly this pin here:


The Mister and I recently moved into a new two bedroom apartment. We're using the second bedroom as a guest room, and I finally asked if I could "have" the closet for my own uses. The Mister agreed, provided I could find ample storage for everything we were hoarding keeping in the space. That was all I needed to hear -- as soon as we got home, I unpacked all of the stuff from the closet and got started! (And yes, it's all still sitting on the floor behind me. I'll clean it up. Someday.)

Here's where my progress is at as of tonight:


While it's not quite the same, I'm really pleased with it! We didn't install a countertop as they did in the inspiration picture because, well, we're renting. Instead, I played around with surfaces before settling on a folding table. This one is 4 feet long by 20" deep and it fits perfectly within a standard closet. It's the only thing I'm not entirely pleased with; I feel like the table has too much play, and when the sewing machine gets moving quickly the table tends to rock pretty badly. I'll need to solve that problem before tackling any large projects, and that table will definitely be the first thing to go if I can find a great desk while thrifting!

Sewing Nook

To the right are a couple of plastic drawer systems, stacked vertically to hold miscellaneous odds and ends for each of my crafting habits. I've also put up a corkboard to hold my current inspirations (or pattern details) and a pretty cross stitch alphabet sampler I found while thrifting a few weekends ago. I'm waiting on hardware to hang my new 60-spool thread holder, and other than that I'm done! My goal was simply to get this in working order; I'm going to try to leave myself some blank space so I can collect pretty inspirations and grow into the nook over time.


I have my little ironing station on another wall of the room. It may seem like a bit of a pain to travel every time I want to press a seam, but I have terrible luck around hot irons and plenty of scars to prove it. Also, this gives me plenty of room to set up my laptop or iPad near my sewing machine so I can watch Netflix blog while I work!

If you're looking to set up your own sewing nook, I highly recommend trying something like this. The table, plastic drawer organizers and cork board were all purchased at a local Walmart for less than $100! This layout also provides plenty of space to each side of the table for storage, and the closet doors close easily even with a chair tucked under the table.

Have you got a sewing nook in your home? Is it a closet like this, or a full blown sewing room? Leave me a comment below! I'd love to see how you have your space organized -- I'm always looking for new ideas.